
Many collections we receive at Wilson Special Collections Library include a wide range of legacy digital storage media. Floppy disks, of the 3.5″ and 5.25″ variety, are very common and our standard work computers obviously don’t come with floppy disk drives anymore! In order to process these materials for preservation and access we need to have legacy hardware to access the disks. We have developed workflows and a lab space to handle these collections (read more here). The lab includes hardware that is sometimes available online (often via eBay) or from specialty retailers. Often the drives or devices aren’t housed in a computer tower or protective case by default. To improve the handling and care of these items, we’ve 3D printed several cases.
Two of the cases we’ve printed used designs available on Thingiverse.
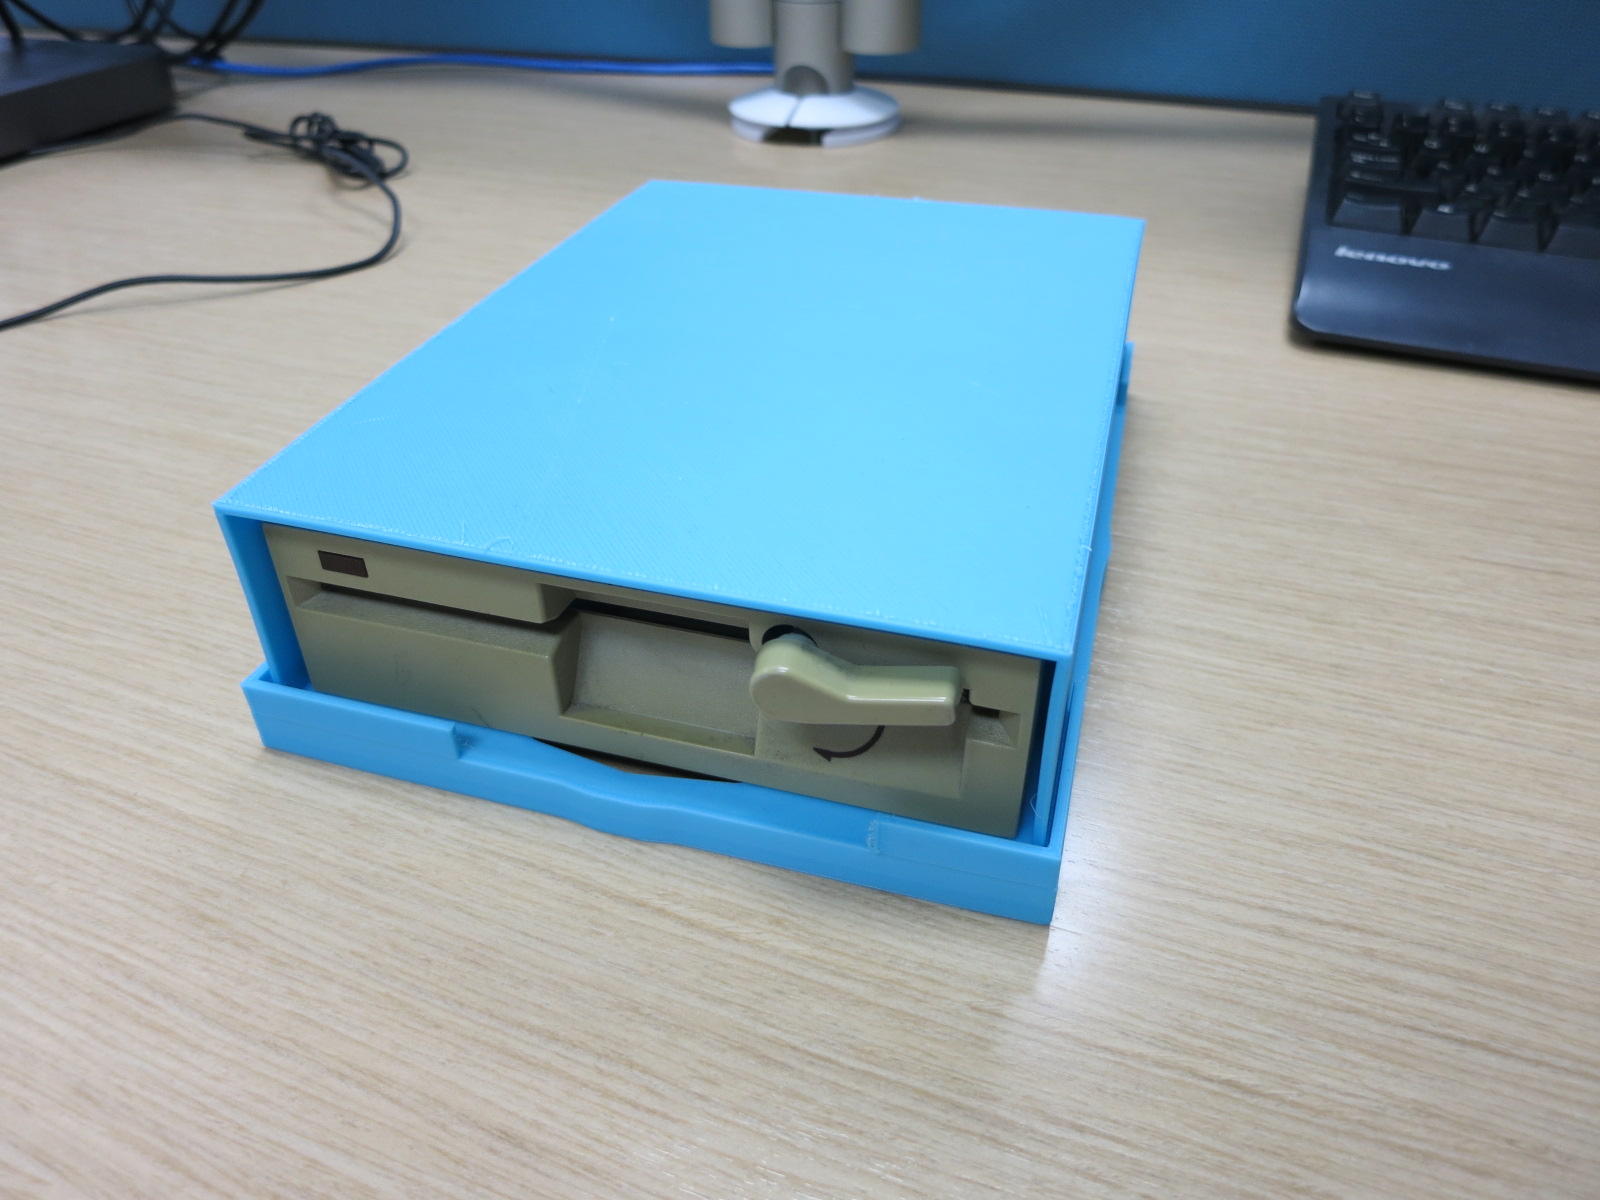
The first was a case for 5.25″ floppy drive. You can find the design on Thingiverse. UCLA Special Collections’ digital archivist, Shira Peltzman, shared their design which was created by graduate student Yvonne Eadon – thank you!
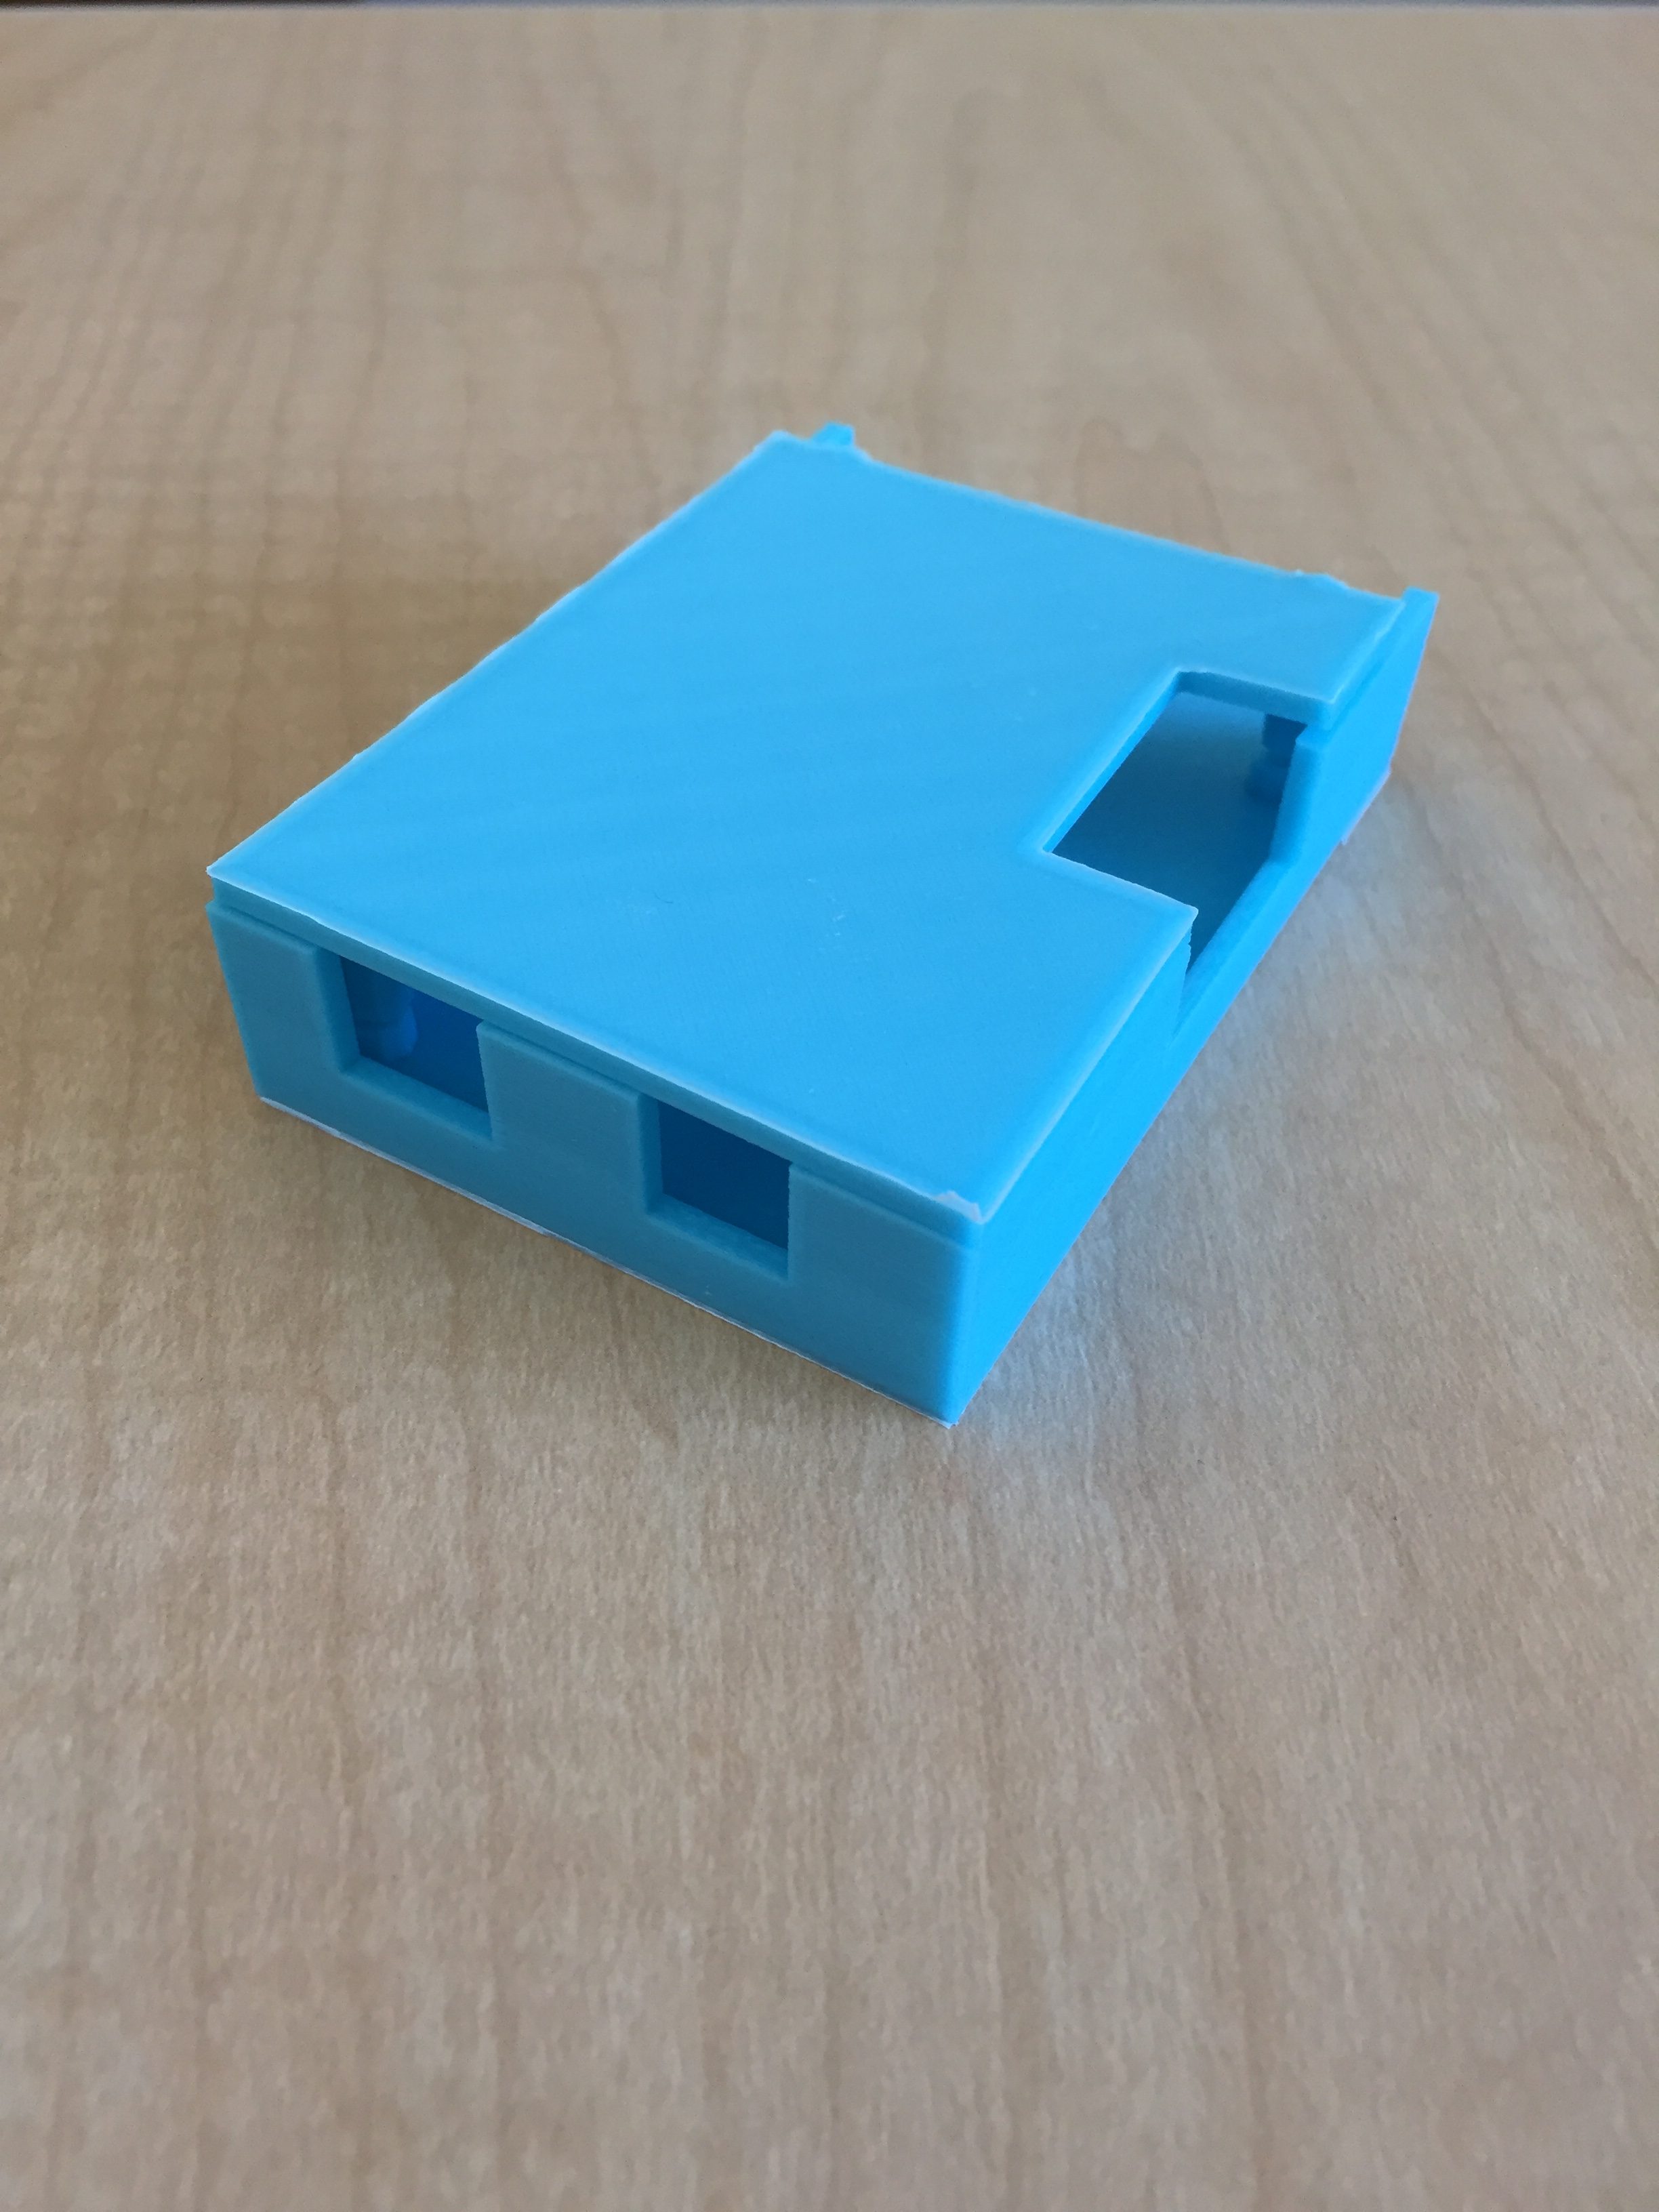
The second was a case for a KryoFlux board. You can learn more about KryoFlux on their website. The design is available on Thingiverse.

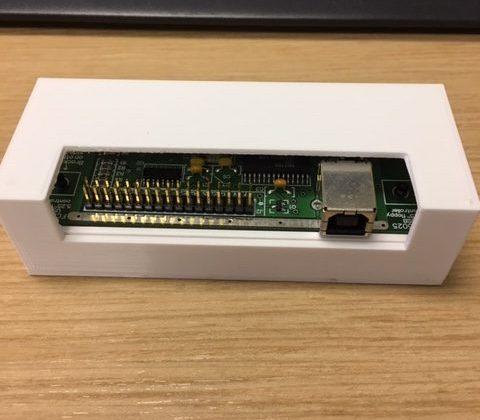
The third item we needed a case for was the controller board for the 5.25″ floppy disk system from Device Side Data. We couldn’t find an existing case, so graduate student assistant Miana Breed took on a project to create and print a design.
Below Miana describes her process:
When given the task of creating and printing a case for the floppy controller circuit board, I was a little daunted. I had never used any CAD programs before or worked with item design. My initial attempt to get a case printed consisted of me going to the Kenan Science Library and hoping that someone would create the case for me! But, alas, I was given instructions for TinkerCAD and sent off to figure it out on my own. (A hands-on learning technique that ended up being very helpful.)
The experience was both interesting and frustrating. I enjoyed testing out the shapes, cutouts, and extensions in the online platform, which is more intuitive than you might think. The program allows two kinds of objects: shapes and holes. Your design is created using these shapes and holes, which are placed around the grid plane wherever you’d like. Objects can be levitated above the grid plane, lowered into or below the plane, and turned at any sort of angle. It takes a bit of playing around to get the hang of creating objects, but I found it to be very user-friendly. There are even some tutorials available through TinkerCAD that show you how to create certain types of objects.

Luckily, because UNC is a research university, the Kenan Science Library was more than willing to print multiple iterations of my design. It took three tries before I finally landed on the right design for the case that offered the most protection with the best fit.
Our highest priorities when making the case were keeping the board secure in the case and protecting the delicate pins on the upper side of the board. The features that keep the board in place inside its tray are the two screw holes on either end of the tray. These line up with the mounting screws on the controller board that are intended to mount the board inside a computer tower.
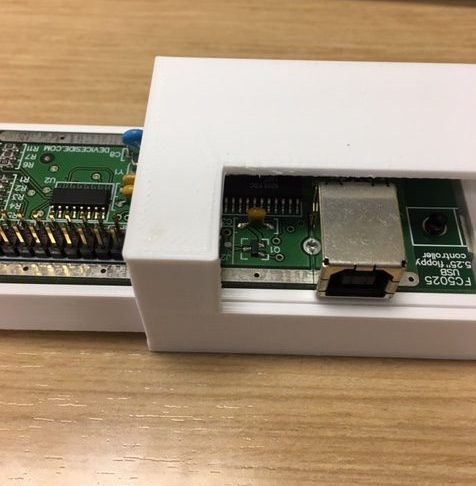
Two of the cases I made were not quite tall enough to avoid brushing the pins, and one of the cases didn’t slide over the USB port. The most difficult pieces to get right were the cutouts on the front of the case. Measuring in TinkerCAD is relatively easy, but sometimes your design gets shifted by millimeters without letting you know. Each time I printed a new case, I thought I had gotten the cutouts measured correctly, with the right depth and distance apart, but I finally decided to go with a design that had one long cutout rather than two individual ones for the USB cable and ribbon cable. One lesson learned from this process is that, sometimes, the simplest design is the best design.
In the photo below, the two cases printed in clear plastic were my first two attempts. If you look closely, you can see two small black marks where I measured how much wider the cutouts needed to be.

My final design for the board included tracks for the inner tray to slide on that aim to keep the tray in place inside the outer case. These tracks were another stumbling block in the third print (grey case in the picture above). Because you can move shapes around so easily in TinkerCAD, designs can sometimes become tilted or swiveled in a way that doesn’t fit all your pieces. When I received my printed case, the tracks were at a slight diagonal and the inner tray slid into the case at an angle that popped one of the seams.
Finally, after several consultations with makerspace staff at the Science Library, I landed on three fixes for my final design: 1) A thicker top and sides for the case that wouldn’t break at the seams. 2) A higher top that would avoid all pins and the USB port. 3) Tracks that were perfectly parallel with the sides of the case. The end result keeps a majority of dust and other particulates off the circuitry and provides some protection for the board. The case also allows the appropriate wires to be attached without removing the tray from the outer case, which will help prevent damage to the pins.
While I was initially a bit reluctant to take on this 3D printing project, I see this sort of design as a valuable skill to have when working with digital archives. Some of the devices we use to read legacy media are difficult to find in their original housings, and some, like the Kyroflux, Device Side Data controller board, and 5.25” floppy drive will come without protection for their inner workings. These pieces of hardware need cases in order to protect and maintain functionality of the devices and our ability to access legacy storage media.
You can find Miana’s design on Thingiverse.